Summary

4-Day 5 Night Hike in Torres del Paine National Park
- Total Distance: 51.6 miles
- Difficulty Level: Easy to Moderate for regular hikers
- Weather: Unpredictable with windy, snowy, cold, and pleasant conditions
- Duration: Multiday Hike, spanning 4 days and 5 nights
- Accommodation Options: Bunk beds, tents with padding, designated tent setup areas
- Food and Cooking: Shelters available for booking in advance or on-site purchase. Hot water provided for food rehydration.
- Shower Areas: Mostly equipped with hot water facilities
- Gear: Apart from hiking essentials, lightweight Crocs are recommended for post-hike comfort. Essential toiletries like soap, shampoo, and laundry soap should be packed. Consider Sea to Summit Biodegradable Travel Dry Soap Leaves for convenience.
- Communication: No cell phone coverage available, but paid Wi-Fi is accessible on an hourly basis.
- East to West W Circuit: The East to West W circuit commences at the trailhead near Hotel Las Torres, conveniently positioned close to Refugios Central and the Torres del Paine Welcome Centre. This route offers hikers gradually improving amenities as they progress westward. Upon completing the trek, hikers can enjoy the comfort of a private room at Paine Grande Lodge.
Navigate to Sections
Planning and booking the W or O Circuits in Torres del Paine National Park, Chile, can be both exciting and challenging. If you are planning to embark on this adventure, you may find it useful to have a complete guide on hand to help you book your refugios, food, ferry, and shuttle ride from Puerto Natales to Torres del Paine National Park and back to Puerto Natales after completing the 4-Day 5-Night W Circuit trek in Torres del Paine National Park, Patagonia. This guide provides comprehensive step-by-step instructions on completing the booking process without needing a guide’s help. It’s worth noting that these instructions are for the east-to-west W circuit, but you can reverse them if you’re going west to east.
Step by Step Planning Guide | |||
|---|---|---|---|
| Step | What/Where | Starting Point Google Map Pin | URL Link |
| 1 | Book your Refuge (Refugio) accommodations and meals for the W circuit. This is the most important step. Take the next steps if you have the circuit accommodations figured out. Two different companies run their exclusive locations. These are combinations of hostels with bunkbeds, campsites, and cabins. Check availability with both vendors simultaneously for your desired dates to ensure you have full coverage. Listed below per vendor by sector: (1a & 1b below) | ||
| 1a |
| Las Torres Patagonia | |
| 1b |
| Vertice | |
| 1 | Get your park permit to PARQUE NACIONAL TORRES DEL PAINE. MUST get this in advance | https://pasesparques.cl/ | |
| 2 | Get to Puerto Natales – e.g. By Air from Santiago. Bus from El Calafate | Flight Options | |
| 3 | Travel from Puerto Natales to Laguna Amarga (Guardería Laguna Amarga – Base Administrativa CONAF) | Bus stop: Terminal Rodoviario (Estación de Autobuses) | By Bus (Bus-Sur) |
| 4 | Travel from Laguna Amarga to Torres del Paine Welcome Center (ask Visitor Center) | Guardería Laguna Amarga – Base Administrativa CONAF | Shuttle Bus (Can pay cash CPL 3000, or book in advance) or walk 7 KM |
| 5 | Walk from Torres del Paine Welcome Center to Refugio Las Torres/ Camp Norte (also called Central Section) | Torres del Paine Welcome Center | Walking Map |
| 6 | Once arrive Refugio Las Torres/ Camp Norte, your W circuit hike starts from here | Refugio Las Torres | |
| 7 | The W Circuit hike usually ends at the Paine Grande Lodge/Refuigio. Journey back to Puerto Natales starts. Take Catamaran from Paine Grande to Pudeto | Refugio & Camping Vertice Paine Grande (Catamaran Google Pin) | Paine Grande to Pudeto Catamaran (Cash Only). 2023-24 rates: CPL 25,000/ US$ 30 |
| 8 | Take bus from Pudeto to Puerto Natales | Sendero al catamaran hielos Patagonia (Pudeto Bus stop) | By Bus (Bus-Sur) |
Note: Here is a complete Trekking Map (After opening the page, click to enlarge the map)
Refugios in Torres del Paine National Park: Comfort in the Wilderness
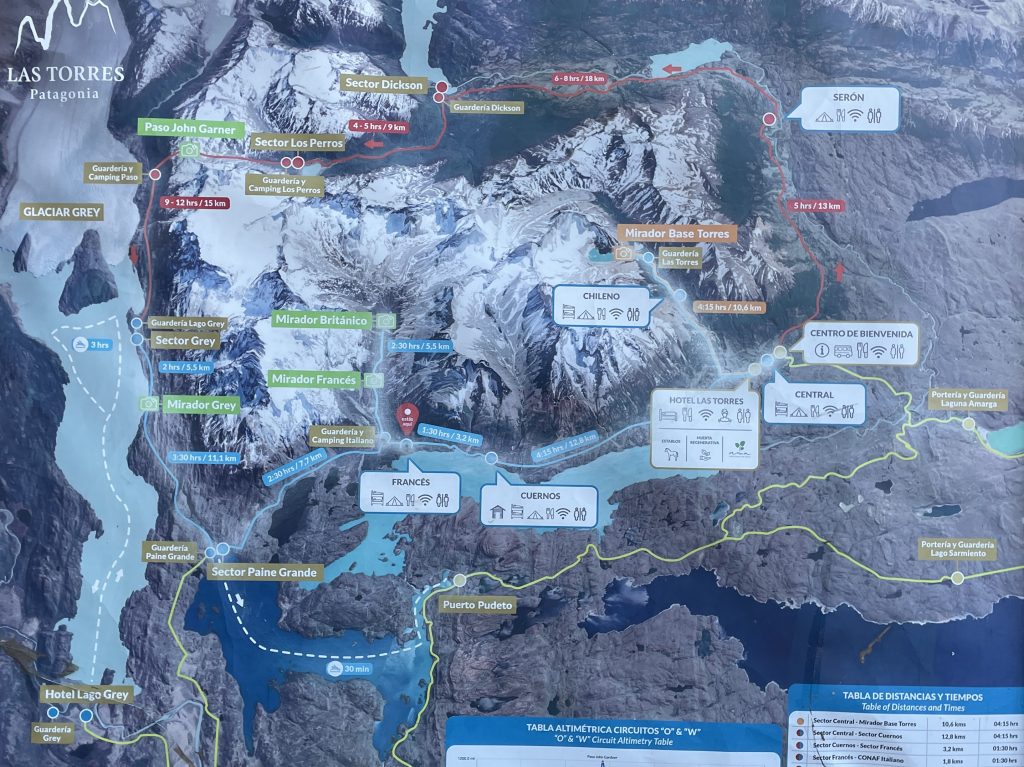
Torres del Paine National Park features five refugios, serving as spacious cabins equipped with beds, meal services, and small shops. They provide amenities like bathrooms, hot showers, and outlets for charging devices. Additionally, some refugios offer rentals for tents, sleeping bags, and sleeping pads, along with meals including packed lunches. Check the following map of the Torres del Paine National Park for the hiking highlights and Refugio Amenities information.
Arrival in Puerto Natales
Upon your arrival at Puerto Natales’ small airport (PNT), you will be greeted by the stunning sight of the mountains on one side and Last Hope Sound, an inlet of the Pacific Ocean, on the other. Puerto Natales is a charming little town where you can easily purchase or rent any last-minute hiking gear or other necessities. It boasts some of the best restaurants and knickknack shops. After enjoying a pleasant dinner at a local restaurant, we prepared for the four-day hike. We rented an Airbnb for our stay, and our host kindly allowed us to leave our extra luggage at their place. We only carried our five-day hiking gear to Refugio Las Torres the next day. It seems to be a common accommodation practice there, but it’s wise to check ahead of time for availability.
Bus From Puerto Natales to the National Park
We had already purchased our bus tickets online, so we walked from our accommodation to the bus stop. The bus ride to the location was far from boring. WiFi was available on the bus and there were stunning landscapes to admire along the way. Be sure to keep an eye out for the diverse wildlife, including iguanas, sheep, and cows.
Travel to Torres del Paine National Park and Trek to Refugio Centro
We arrived at the National Park around 5 pm but decided not to hike that day. Instead, we spent the night at the Refugio. It was raining when we arrived, but luckily, that was the only day with rain. We were fortunate because the rest of the hiking days were warm and sunny, with minimal wind, which provided us with excellent views.
The Refugio Torre Central features a bar and dining area. You have the option to book your dinner online or bring your own dehydrated food, for which you can access hot water to rehydrate. Refugio provides a readily available hot water dispenser, so there’s no need to ask; you can go and get the hot water you need. Additionally, if you haven’t reserved your dinner, you can purchase items like pizza, burgers, or sandwiches on demand. However, it’s important to note that reservations for the next day’s lunch pack and breakfast need to be made online in advance. (this information is as of March, 2024)
Accommodation and Other Amenities at Refugio Centro
Accommodation typically features bunk beds, with six beds in a room. Shared bathrooms are meticulously clean, but guests should bring their own soap, shampoo, and slippers for added comfort.
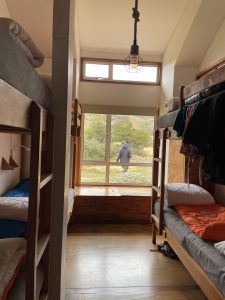
There were ample showers and restrooms available, and obtaining hot water in the shower was never an issue as different people used them at various times. However, the bar area tends to get crowded, so arriving early is advisable to secure a seat. Finding a free table after 7 p.m. can be challenging. There is no cell phone connectivity, but paid Wi-Fi service is available on an hourly basis at the Refugio.
Although the rooms are comfortable, it’s possible that you might experience some disturbances during your sleep due to snoring and occasional temperature changes in the middle of the night. However, after a long day of hiking, having a bed to rest on is still greatly appreciated. It is advisable to bring earplugs with you to avoid any disturbance caused by snoring sounds.
Day 1: Hike to Las Torres Base and Back to Refugio Centro
Distance: 13.31 miles (Round Trip)
Time: 6.5-7hours
Ascent 3,090 ft
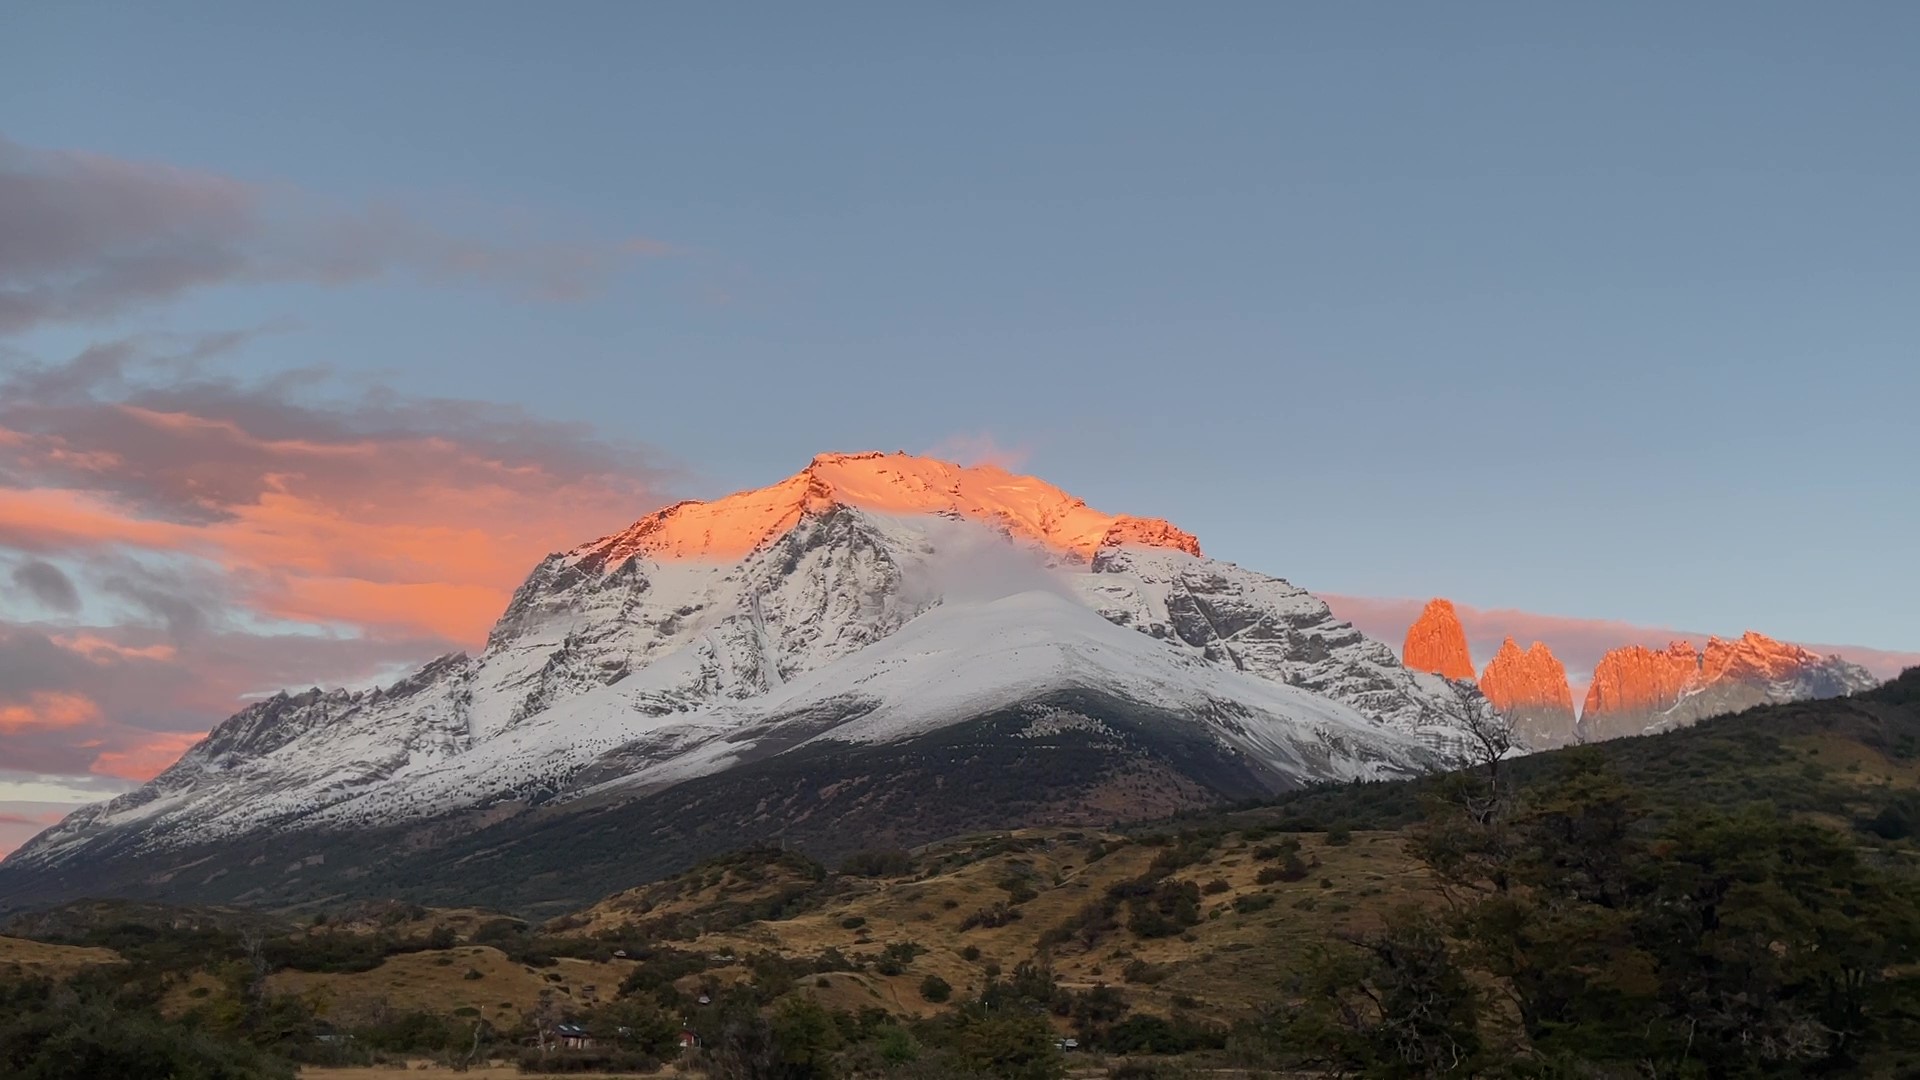
We embarked on our hike after breakfast that is served in two shifts between 7-8 am. Luckily, the sunrise in Patagonia is relatively late; it is between 7:30 and 7:45 AM in March (after 9 AM in May). As soon as you step outside the Refugio, you will be amazed to see the beautiful shimmering red Torres del Paine.
We only carried daypacks as we were spending the night in the same Refugio. We started our trip at 9:00 am and finished around 4:00 pm. Depending on your walking pace, the hike to Refugio Las Torres typically takes 4 to 5 hours (one way). The trail encompassed various terrains, including grassy areas, rocky terrain, trees, and some icy patches. Due to the previous day’s rain, there was some snow on the mountains, but we did not need spikes for the snow on the trail. The hike involved a gradual, steady uphill climb of about 2 and a half miles until we arrived at Chileno campground. Once we passed the Chileno campsite, we noticed a significant increase in elevation, with the last kilometer being particularly steep.
Overall, the hike was medium to difficult but not challenging. Experienced hikers usually complete it in about 7 to 8 hours round trip. There were plenty of places to get water along the way, so we didn’t have to carry a lot of it.
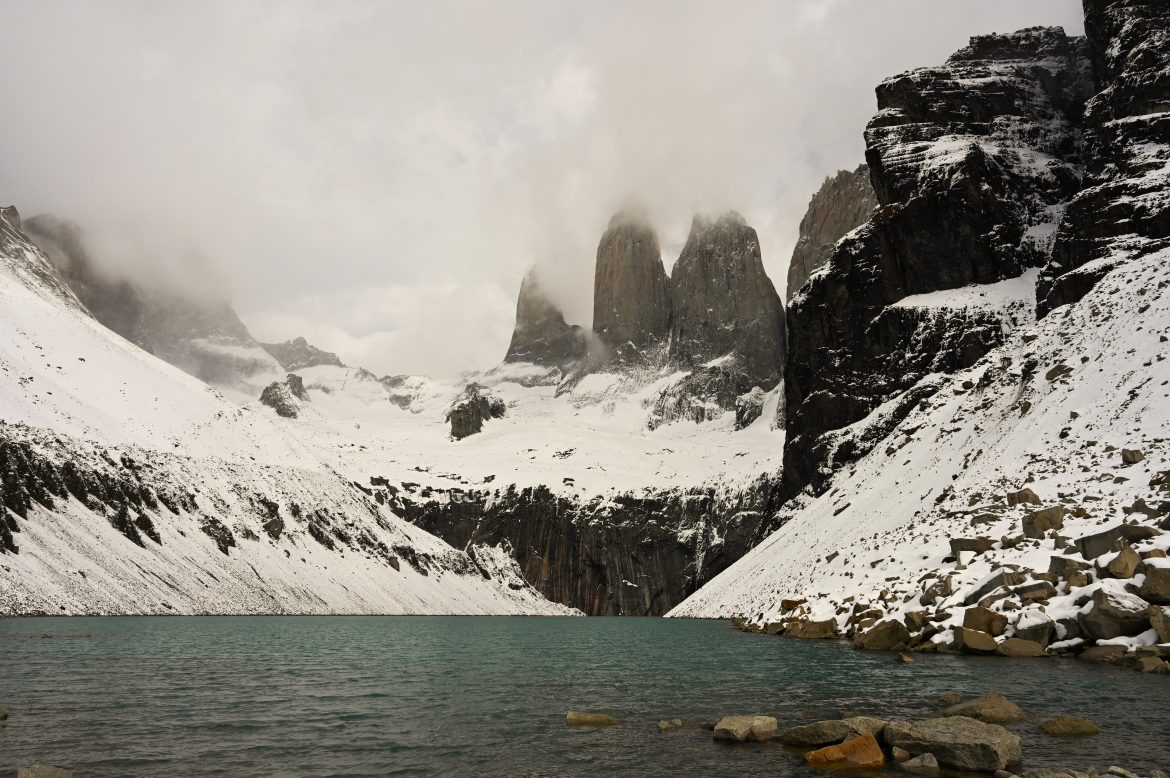
At the end of the hike, we enjoyed breathtaking views of the Torres del Paine peaks from the viewpoint Torres del Paine—Mirador las Torres. Finally, when we arrived at Refugio Centro, we were ready to relax and rest up for the next part of our adventure.
Here is a complete route map of the Torres del Paine W Day 1 hike
Day 2: Trek to Refugio Frances
Distance: 10 miles (Round Trip)
Time: 6 hours
Ascent 1,345 ft
Next day, we started our hike at 9 am. Despite the lengthy journey, the terrain remained relatively flat, alleviating any burdens of carrying our backpacks. Most of the hike followed the water, with the stunning backdrop of volcanic mountains. There were plenty of beautiful views of mountains, the lake, and the lakeshore throughout the hike. We spotted a condor soaring in the sky while enjoying our solitude moments at the shore of Nordenskjold Lake. The weather was about 60 degrees Fahrenheit and sunny, with a refreshing breeze. This section of the W Trail is the most picturesque and effortless portion of the entire W Circuit.
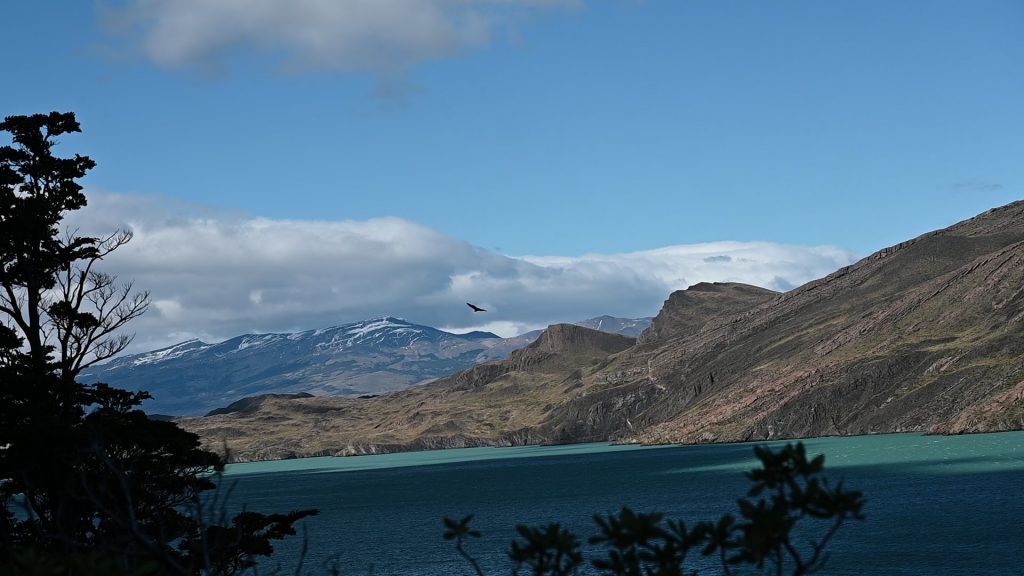
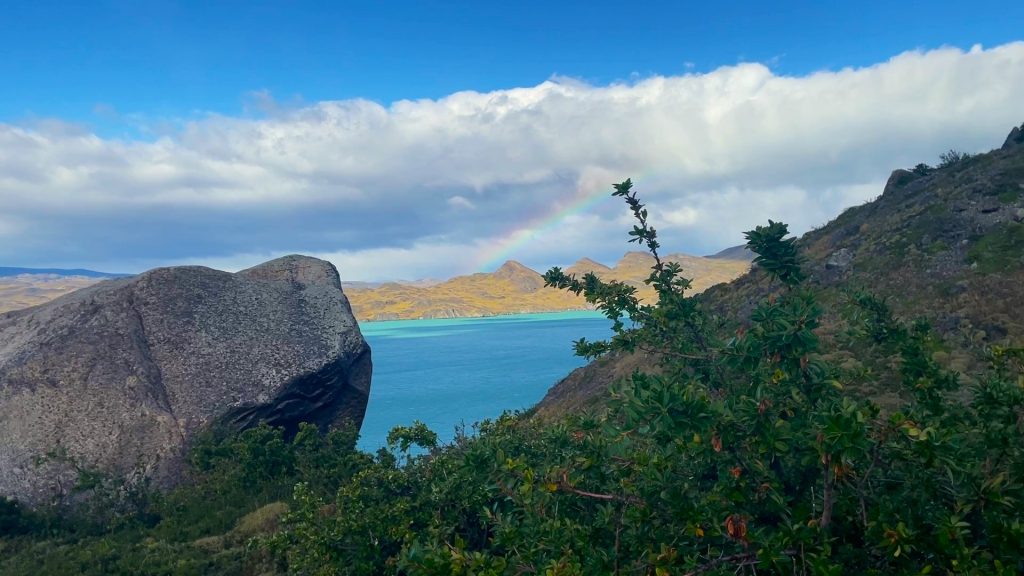
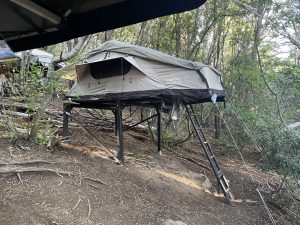
We passed Refugio Cuernos and spent a night at Refugio Frances. Unfortunately, we couldn’t get bunk beds and had to stay in a tent. The tent was above ground and had padding along with sleeping bags. The night in the tent was quieter than the previous two nights at Refugio Centro, but it was colder inside the tent. We found out that the hot water had run out by the time we went to shower, so we had to settle for a quick lukewarm shower. Dinner at this refugio was served in boxes and was average in quality.
Here is a complete route map Day 2 hike from Central to Francés
Day 3: Trek to Valle Francés and Britannica Lookout and Further to Refugio Paine Grande
Distance: 13.5 miles (Round Trip)
Time: 8 hours
Ascent 2,458 ft
This 3rd day hiking adventure marked our most extended trek yet. It featured significant elevation gains and the added challenge of carrying our backpacks for most of the journey.
Our first stop was the Italiano Ranger and campsite, where we left our backpacks and chose to carry only daypacks for the hike up to Frances and Britannica lookouts. There was no need to enter the building; instead, we placed our backpacks outside by the wall. On our return journey, we retrieved our bags and continued our adventure in the Paine Grande sector. The panoramic views from these vantage points were breathtaking, showcasing the raw beauty of the Patagonian landscape.
Despite the physical demands of the hike, the rewards were plentiful. On clear days, we were treated to awe-inspiring vistas of cascading avalanches, majestic peaks, meandering water streams, and cascading waterfalls. The tranquil Lago Skottsberg, mirroring the surrounding mountains like a flawless mirror when the winds were calm and the sky clear, left us spellbound.
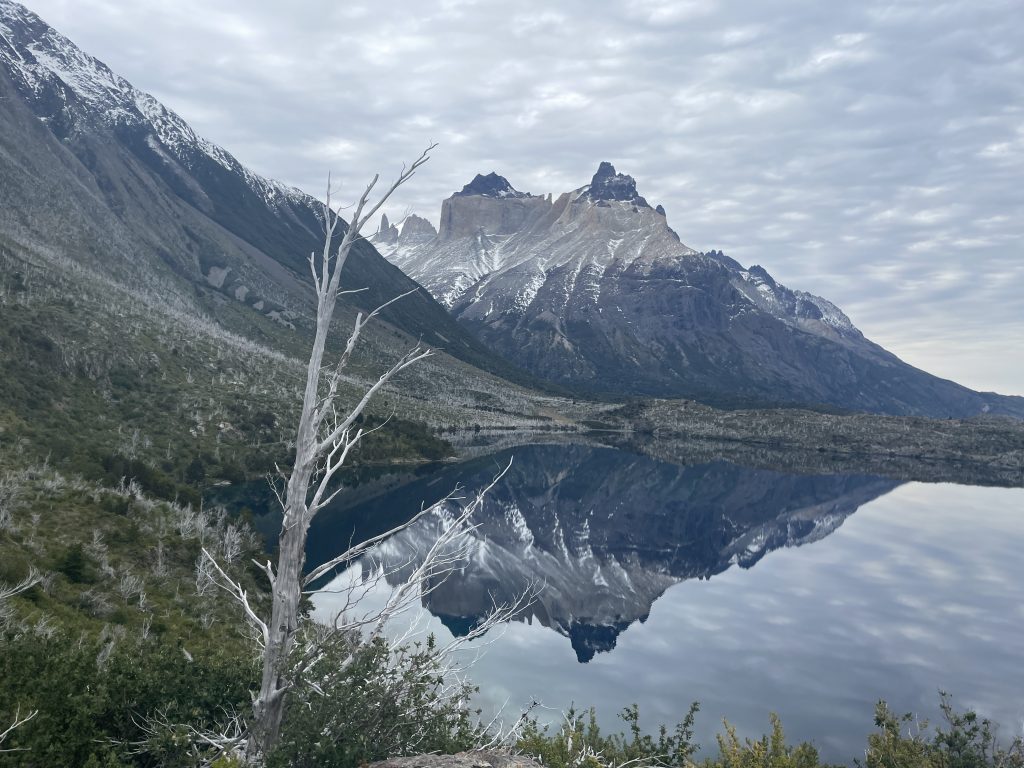
This leg of the journey proved to be both exhilarating and challenging, with varying terrain and elevation changes testing our endurance along the way, ultimately leading us to the lodge. The Lodge Paine Grande surpassed our expectations, offering buffet-style meals and a cozy bar area. It was bustling with activity yet impeccably maintained and managed. The accommodation exceeded the previous three nights, as we had a private room featuring two bunk beds. This was the first night we enjoyed the privacy of our room, allowing for a restful night’s sleep after three days of adventure.
Here is a complete route map for the Day 3 hike from Francés to Paine Grade
Day 4: Trek to Paine Grande to Glacier Grey and Return to Puerto Natales
Distance: 14.8 miles (Round Trip)
Time: 7 hours
Ascent 2,086 ft
The long and leisurely hike took us 7 hours and 32 minutes, spanning from Paine Grande to the last mirador beyond the Refugio. Along the way, we savored the stunning vistas of Lakes laguna Los Patos and Log Grey, and the surrounding mountains, adding to the allure of the journey.
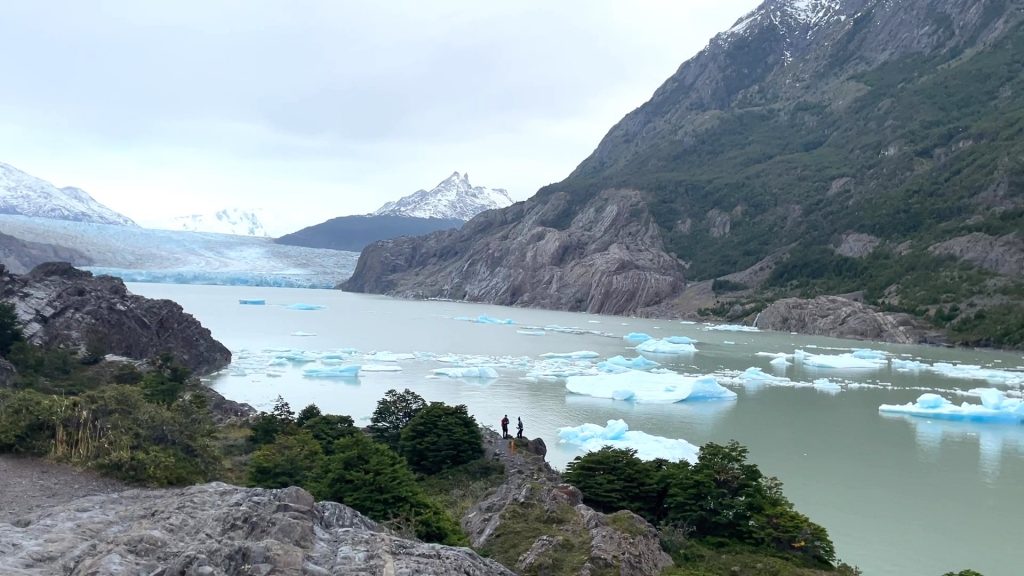
After you pass the Camping Grey Information Center, you will reach the Mirador Grey, from which you can enjoy a beautiful view of the Grey Glacier. You can use the restroom at the Information Center, refill your water, or buy snacks. Most of the hike followed the picturesque Grey Lake, culminating at the final mirador, where we were treated to breathtaking views of a glacier and floating icebergs.
After completing our four-day hike, we enjoyed our last drinks at the lodge bar while admiring the breathtaking mountain views. From the Lodge Paine Grande bar, we could see both Cerro Fortaleza, towering at 8796 feet, and Mount Paine Grande, which stands at 9364 feet. As the sun began to set, its light danced on the mountains, creating a stunning display.
We stayed the fifth night at the same Refugio Paine Grande and took a ferry back to Puerto Natales the next day. It’s a 30-minute ferry ride to the bus stop, and there is a small cozy cafeteria where you can wait until your bus departs. The buses are on the spot, so you can put your bags inside the bus. They will depart on time, so you can wait inside the cafeteria while having some warm snacks, coffee, beer, drinks, and sandwiches.
Here is a complete route map for the Day 4 hike from Glacier Grey to Paine Grade
General Guideline
Research and Itinerary
- Familiarize yourself with the W Trail, its difficulty, and the highlights of each leg (Base Torres, Valle Frances, and Glacier Grey). In our blog, we tried to ensure you have enough information to help you plan and prepare for a long multi-day hike.
- Decide how many days you want to spend on the trail. A typical itinerary is around 5 days, but it can be adjusted based on your preferences and hiking speed. You can even do day hikes to experience the adventure.
Season and Weather: The Best Time to Hike
Check the weather conditions for the time you plan to visit. The trekking season is generally from October to April, with the peak season being from December to February. We did our hike in March when the precipitation is usually low.
Permits and Reservations
- Torres del Paine has a limited number of visitors allowed each day, so it’s crucial to secure your spot in advance.
- Make reservations for campsites or Refugio (mountain huts) along the trail. The popular spots can fill up quickly.
Accommodation Options
- Decide whether you want to camp or stay in Refugio. Camping requires you to carry your own gear, while Refugio’s provide meals and a bed.
- Popular Refugios include Refugio Torres Central, Refugio Los Cuernos, Refugio Grey and Paine Grande
Gear and Packing
- Prepare a detailed packing list based on the season. Essentials include a good pair of hiking boots, waterproof clothing, a warm sleeping bag (if you are staying in camp. Camps are up-ground and provide padding that helps you reduce your backpack by not carrying the sleeping pad), and a day backpack.
- If camping, bring your own tent, sleeping bag, food and cooking equipment.
- Hiking poles and microspikes are advisable because even in March, the driest month, it snowed high up in the mountains, and we found one tricky patch during the last stretch of the Torres de Paine hike.
- A rain jacket is an essential item to bring on the W Track. It not only protects you from rain but can also serve as a windbreaker. The trail can experience strong winds, with gusts reaching up to 45 kilometers per hour.
Transportation
- Plan your transportation to and from the park. The nearest major town is Puerto Natales.
- Prior booking buses or shuttles from Puerto Natales to Torres del Paine saves time and hassle.
Fitness and Health
Assessing your fitness level and preparing accordingly is crucial when planning to tackle trails like the W Track, even if it may not seem initially challenging. Despite its moderate difficulty, the length and terrain of the trail can keep you hiking for several days. Therefore, being physically prepared is essential for an enjoyable and safe experience. Take the time to train and condition your body for the demands of the trails to enhance your performance and also reduce the risk of injury along the way.
Permit Check
Double-check that you have all necessary permits, reservations, and required documentation before departing. Print or make sure that you have offline access to all permits and reservations. Printing service is available in Puerto Natales.
Stay Informed
Keep an eye on weather updates and park regulations. Conditions can change, and it’s essential to stay informed. Inside Refugio, you will find live weather, particularly wind speed updates.
Booking Websites
Use official park websites or reputable booking platforms to secure your reservations.
Cell Service and Wi-Fi
There is no cell coverage after Puerto Natales. Wi-Fi is available at some refugios.
